 The taste of not just good food, but good luck
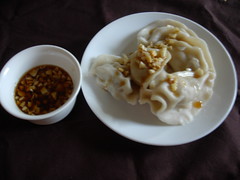
Recipe #31: Chinese dumplings/gyoza (pork with Chinese chives)There is a saying in North China that goes, "nothing is more delicious than dumplings, nothing is more comfortable than lying backwards." Chinese dumpling are among the most important and delicious foods in life.
Dumplings are similar in shape to gold and silver ingots, which symbolize wealth. Traditionally, family members often get together to make dumplings, especially during the Chinese New Year's Eve. They may hide some coins in one of them. It is believed the person who finds a coin will likely have a good fortune in the coming year.
Most Chinese folks start making them while young. Not only do they attain happiness, they also practice their nimble skills, socializing and working at the same time. It is a great teamwork. Whenever my mother saw my grandfather making dumplings, she would rush in to help. She could wrap them so fast that two people can fill them at the same time.
There are several steps in making dumplings. We begin by making the filling. The dough is then prepared. Finally, the dumplings are wrapped and cooked. If preferred, they can be accompanied by dipping sauce.
Ingredients (filling)1. 1 lb. ground pork
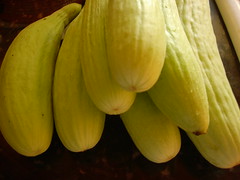
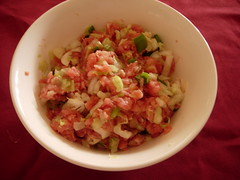
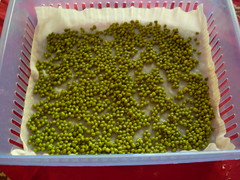
2. 1/2 lb. Chinese chives, cut into 1/2 cm lengh
3. 2 tsp. ginger, grated
4. 2 Tbsp. sesame oil, divided
5. 1 Tbsp. olive oil
6. 1/4 - 1/2 tsp. salt
7. 1 Tbsp. soy sauce (optional)
8. 1 Tbsp. cooking wine
Directions (preparation)1. Mix well ground pork with ginger, salt, wine, soybean sauce, 1 Tbsp. sesame oil and olive oil.
2. Add Chinese chives, and mix well.
Ingredients and materials (dough and wrap)1. 3 c. all-purpose flour
2. 3/4 c. water
3. handful of flour (about 1/4 c.) to prevent sticking during kneading
4. a rolling pin
Directions (dough)1. Measure the water into a medium sized bowl. Add the flour and combine ingredients.
2. Place the handful of flour on a table. Knead the dough, making sure to add water or flour until you get a smooth consistency.
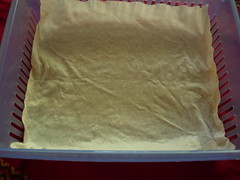
3. Cover with a wet cloth and let it rest at least for 30 minutes.
4. Cut dough into 3 or 4 parts. Roll one of them into a long thing breadstick-like shape, and cut into small parts of equal size.
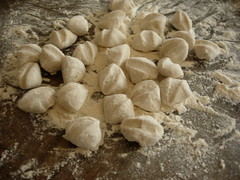
5. Press it into the 1" diameter circle.
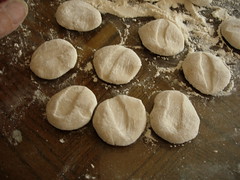
6. Using a rolling pin, roll each piece into a flat 2" circle, with the dough being thicker in the center and thinner at the outside.
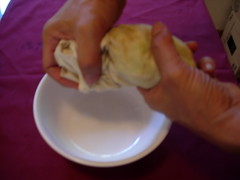
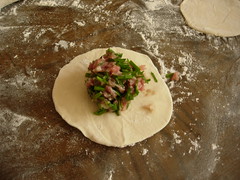
Directions (wrap)1. Add a spoonful of filling to the center of the dough circle.
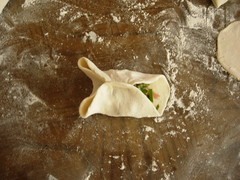
2. Fold the circle in half.

3. Push left side into two "corners."
4. Press the front edges together, and then do the same with the behind.

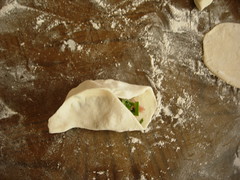
5. Repeat the same steps on right side.
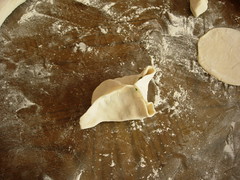

6. Pinch the edges together to seal.

7. Place each dumpling on a floured tray.
 Directions (cooking)
1. Fill a 5-qt. pot to about 60-70% and bring to a boil.
2. Add the dumplings while stirring gently to prevent them from sticking.
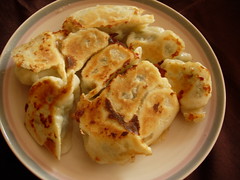
3. Bring the water to a boil again, cover and reduce heat to about medium. Cook the dumplings for about 3-5 minutes, or until dumplings float up on the top of the water.
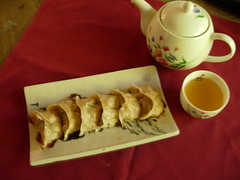
4. Gently remove them from the water to a large plate with a stainless steel colander and serve on a plate.
5. If you like, you can serve with dipping sauce on the side
Ingredients (dipping sauce)1. 1 Tbsp. Rice vinegar
2. 1 Tbsp. soy sauce
3. 1 tsp. sesame oil
4. 1 Tbsp. chopped garlic
DirectionsThe recipe for the sauce is very simple; just mix the ingredients together. That's it!
Tips1. For health, we use a mix of all-propose and whole grain flower in a 1:2 ratio.
2. Because every brand of flour is different, you must use different amounts of water. It is only an estimate; you will need to adjust it accordingly.
3. We use very little salt; sometimes we use less than 1/4 tsp. If you don't want it to be too salty, you can use one of two methods: the first one is to microwave 1 tsp. of the filling and taste it. You can also cook a single dumpling and taste it.
4. There are many possible varieties of fillings. Chinese chives are one of the most popular and most simple. Thus, we use Chinese chives in this recipe. Other fillings will be introduced later.
5. We usually use Japanese sake for the cooking wine.