
Categories

Sunday, December 12, 2010


Do you love bread? Chocolate? Or both?
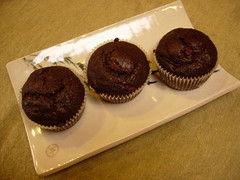
Recipe #61: chocolate chip bun


If you are one of those people who never get tired of eating bread or if you are one of those people who never get tired of eating chocolate, then you defintely won't get tired of our chocolate chip bun.

If you're tired from working overtime, or if you have a carefree afternoon, or if you're enjoying a rainy day, a chocolate chip bun and a cup of tea or coffee will make you feel like you're the luckiest person in the world.

Some of my colleagues even asked me where I bought this. If you follow this recipe, your creation will look very professional.

Ingredients

1. 3/4 c. water
2. 1 egg
3. 1/4 c. butter
4. 1/4 c. sugar
5. 3 c. bread flour
6. 1 tsp. salt
7. 2 tsp. yeast
8. handful of chocolate chips
9. chocolate syrup
10. half of an egg yolk and 1 tsp. water, mixed well

Directions (dough)

1. Mix all ingredients, except chocolate chip, syrup and egg yolk, in bread machine
2. Set to "dough"; once the dough is ready, remove it from the container and punch it down.
3. Split dough into 8 to 12 pieces, depending on how large you want each to be.
4. Flatten the center of each piece a bit
5. Apply egg yolk mixture to surface of dough pieces.
6. Add chocolate chips on center of buns.
7. When dough has risen a little more (after about 20 to 30 minutes), add chocolate syrup.
8. Put in oven (preheated at 350 degrees) for about 15-18 minutes.
9. When buns are golden, remove from oven and add chocolate syrup.

Tips

1. Chocolate chips can be used whole or chopped into small pieces.
2. If you do not have chocolate syrup, the buns will still taste very good.

Friday, December 3, 2010


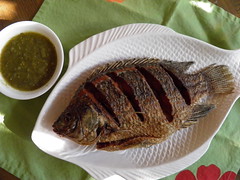
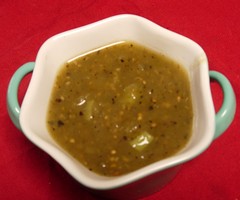
Recipe #60: fried tilapia with green sauce (salsa verde)

My parents grew up in Taiwan. When they were younger, the Taiwanese economy was not as strong as it is now. Everyone was on a budget, and commodities had to be carefully rationed. At that time, tilapia was a staple food for the middle class; it was both affordable and high in protein. There were many ways to prepare tilapia, so it was highly welcomed. Even after my parents moved to America, their love for tilapia has not changed.

On day, we saw fried tilapia at a family-owned Mexican restaurant. My mother immediately ordered it. As soon as the crispy, freshly-fried tilapia was brought onto the table, all of us grabbed a chunk of it, eager to dip them in the green sauce. To my mother, it was the best sauce she's ever tasted.

Ever since then, we have started preparing tilapia this way. In our home, we have an additional method of making this dish.

Ingredients (tilapia)

1. 1 tilapia, cleaned (guts must be removed)
2. oil for frying
3. 1/2 c. flour (for breading)

Directions (tilapia)

1. Pat tilapia dry with a paper towel.
2. Using a knife, cut two or three gashes in both sides of the fish, at an angle.
3. Fill a large skillet with oil; using medium-high, gradually heat until oil is hot.
4. Spread flour evenly on large plate. Put fish on flour and press until bottom has gathered enough flour. Flip fish over and repeat.
5. Put fish into oil fry until golden brown.

Tips (green sauce)

1. If you are using a skillet, the flour will make the fish more crispy and reduce the time needed for frying. If you are using a deep pot, then the flour is not needed; you can use the cleaned fish directly.
2. If you don't cut the fish open, it will be too thick; in other words, the interior of the fish may be still raw while the outside is golden brown.
3. Some Chinese supermarkets will fry the fish for you; ask the fishmonger if the store has this service. However, supermarkets have the tendency to reuse oil for frying, which is less healthy and has a lower quality.

Ingredients (green sauce)

1. 4 cloves of garlic, chopped
2. 6 tomatillos, cooked in water until tender, chopped (canned is OK)
3. 4 chilis serrano
4. 3 Tbsp. vegetable oil
5. pinch of salt
6. 1/2 tsp. mild chili powder
7. 1/2 tsp. ground cumin (optional)
8. 2 c. water
9. 1 Tbsp. onion, chopped
10. 1 Tbsp. cilantro
11. 1 fresno pepper, chopped (optional)

Directions (green sauce)

1. Boil water in pot. Add tomatillos and cook briefly.
2. Remove skin; add garlic, serrano onion and a pinch of salt; puree mixture with blender.
2. Heat a little oil in a deep skillet. Add above mixture and cook on medium-high for 10 minutes or until it has thickened.
3. If you want the sauce to be spicy, you can add cumin and chili powder.
4. Add chopped fresno chilis and mix well for best presentation.
5. Serve as a side with tilapia.

Sunday, November 28, 2010


Crispy and aromatic, a great gift for the holidays
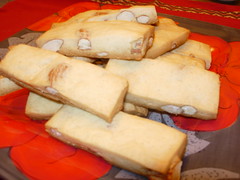
Recipe #59: almond shortbread


My mother's shortbread is always really good. For this past Thanksgiving, my mother and I decided to make another of them, to give to different friends. Shortbread is sold everywhere, whether in the supermarket or bakery, or from the Girl Scouts. They all taste pretty good, but they generally contain ingredients that maintain their freshness. In terms of textures, our homemade cookies are all-natural, freshly baked and full of buttery goodness, and have none of those ingredients. Each crispy bite holds the essence of almonds, which the shortbread sold in stores cannot compare to. No wonder everyone who has tasted it have told us that it was fabulous.

In reality, shortbread is easy to make, although the method is slightly difficult. As the dough is very, very sticky, it can be hard to knead into the desired shape. However, this is rewarded with the best shortbread you'll ever taste.

Ingredients

1. 2 sticks (1 c.) butter, at room temperature
2. 1 c. sugar
3. 1 egg
4. 2 c. cake flour
5. 1/2 c. whole roasted almonds

Directions

1. Beat butter until soft.
2. Add sugar, and then flour and almonds. Mix well.
3. Cover the bottom of a small (about 8" x 11") baking pan with parchment.
4. Using your hands, push the dough evenly into the baking pan. You can use a rolling pin at the end if you want to.
5. Put in refrigerator for two hours.
6. Remove from refrigerator, and lift the entire mixture, including the parchment, to the table or board.
7. Using a knife, cut the dough into a rectangular pieces.
8. Put pieces in a larger baking pan, with at least 1 cm between each piece. Put in oven preheated at 350 F on the center level.
9. Bake for about 17 to 20 minutes.

Tips

1. When we make it for ourselves, we sometimes substitute 1/3 of the flour with whole wheat flour.
2. We also reduce the sugar to 1/2 c. Whole wheat has its own natural sweetness, so we don't need so much sugar.
3. The reason for putting the dough in the refrigerator is to let the butter re-solidify; otherwise, the dough will be stick and hard to cut.

Friday, November 26, 2010

on hiatus...

Hi everyone, you may have noticed that I haven't posted any new recipes in a while.

The thing is, I recently got a job at Cisco! :-) Unfortunately, I must spend a lot of time preparing for my new career, so I don't have so much time to update this blog. Of course, I will still post recipes whenever I can. Rest assured that I have not forgotten about this blog.

Edit: I'm back! Well, sort of...

Wednesday, November 10, 2010


Recipe #58: beef with green beans

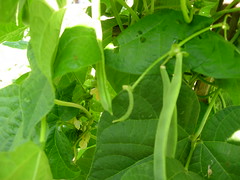
We plant green beans every year. Because there is a large harvest every year, we can harvest them as soon as they're tender. These beans are delicious when sauteed, regardless of what other ingredients you use with them. Beef with green beans is the easiest to make, but it tastes extremely good. However, it's hard to find this dish even in restaurants, because it's hard to obtain beans that are so tender. Don't worry if you don't have any tender beans; the below sections contains a few tricks that will improve the texture.

Ingredients

1. 1 lb. green beans, trimmed
2. 3 oz. beef flanks
3. 2 tsp. soy sauce
4. 1 tsp. sesame oil + 1 tsp. oil (for marinating)
5. 1 Tbsp. oil (for stir-frying)
6. 1 tsp. cooking wine
7. pinch of sugar
8. 1 tsp. corn starch
9. salt to taste

Directions

1. Cut beans into halves of thirds, depending on length.
2. Cut the flanks against the grain and put into small bowl.
3. Mix all condiments (except salt) into bowl with beef.
4. If possible, marinate for at least 10 minutes to allow the flavor to go in.
5. Put oil into saucepan; when oil is warm, add beef and stir-fry. When beef is medium well, move beef back to bowl. When oil is still warm, add beans and stir-fry. If the beans are in season but not as tender as you expect, you 1 tsp. hot water along the side of the saucepan; the vapor will make the beans cook faster.
6. Add salt to taste.
7. Add beef back; stir-fry until beef is done and the beans contain the beef flavor.
8. If the dish is too dry, add 1 tsp. hot water to the marinating mixture and pour into saucepan, and stir. Serve hot.

Tips

1. If you like black pepper, you can add it to the marinating mixture.
2. If you are using beans bought during the winter, they will be a bit tough, in which case you can prepare a pot of boiling water. Cook the beans in the water briefly and drain with a strainer; this will make the beans more tender.

Monday, November 8, 2010


My favorite tofu dish
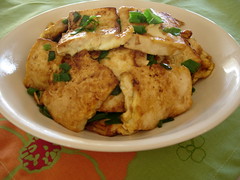
Recipe #57: wok-ta (tower) tofu


Whenever I went to a Chinese restaurant, I would always order wok-ta tofu, if it were available. After it is friend, the tofu is stakced like a tower, hence its name.

However, it is hard to actually stack the tofu; it is usually laid out in a plate when served. Thus, it is rarely called "tower" tofu.

The standard method is to cover the tofu with a layer of flour, and then beaten egg, before frying. Thus, the tofu has a delicious skin and a tender center. Since we tend to avoid friend foods, my mother has devised a version of this recipe that does not involve frying. The finished product has a different texture, but is equally delicious.

My mother prefers to include a few hot dishes at parties, and wok-ta tofu would be one of them. In many cases, the dish would be gone before my mother has finished cooking the other ones!

Ingredients

1. 1 carton of firm tofu (1 lb.)
2. 1 egg, beaten
3. 1 green onion, chopped
4. 2 Tbsp. soy sauce
5. 1 Tbsp. oil

Directions

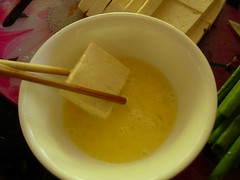
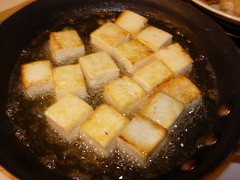
1. Cut tofu horizontally into two halves. Cut each half into 1 cm-thickness. Each piece should be about 1.5" x 1.5" x 1 cm.
2. Heat oil in a large skillet and dip tofu into egg mixture, ensuring that each piece is completely covered. When oil is warm, arrange tofu pieces in skillet, covering the skillet completely. Cook on medium high heat.
3. After you have finished arranging the tofu, the bottom half should be golden. Flip each piece using a spatula. At this point, add some soy sauce, making sure that each piece has some sauce on it.
4. Flip each piece again. Add the other half Tbsp. soy sauce. Add onion.
5. Flip each piece yet again. Turn off heat.
6. Move to plate and serve.

Tips

1. If you're not sure how to cut the tofu, refer to the above picture.
2. Different brands of soy sauce have varying levels of saltiness, so you will have to adjust accordingly.

Saturday, November 6, 2010


A Mediterranean sensation on a plate
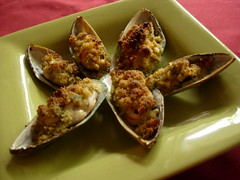
Recipe #56: grilled mussels


Ingredients

1. 12 fresh mussels
2. 1 Tbsp. pesto
3. 1 Tbsp. bread crumbs
4. 2 cloves of garlic, minced
5. pinch of parmesan cheese
6. 2 Tbsp. olive oil

Directions

1. Clean mussels and remove one half of the shell
2. In a bowl, mix pesto, bread crumbs, garlic, olive oil and parmesan well.
3. Spread mixture on mussels.
4. Using broil, preheat 10 minutes. Put in mussels for 5-7 minutes until golden.

Tips

1. If you don't have fresh mussels, frozen ones work as well, as long as they are thawed.
2. Pesto can be bought in warehouse or Italian stores, or in supermarkets, often freshly made. If you don't use up the pesto, you can save it for a later batch.
3. Because pesto tends to be salty, we don't add other condiments.
4. Pesto contains pine nuts, so those allergic to them should avoid this.

Thursday, November 4, 2010


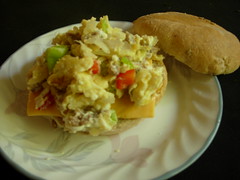
Recipe #55: scrambled eggs with chorizo

We love Mexican food. However, we usually only eat it in the noon or evening, so there are few chances to have a Mexican-style breakfast. Whenever we want to have a breakfast with Mexican flavors, this scrambled egg with chorizo is a great choice.

If you already know how to make the Italian sausage variant, this recipe will be a piece of cake.

Ingredients

1. 1/2 yellow onion, diced
2. 4 oz. or more chorizo
3. 1/2 green peper, diced
4. 1/2 red pepper, diced
5. 1 green onion, chopped
7. 1 Tbsp. oil
8. 4 eggs
9. black pepper to taste
10. pinch of salt

Directions

1. Break chorizo into small bits and cook on medium-high using a small skillet.
2. In a large skillet, add oil. On medium-high heat, when oil is slightly warm, add onions.
3. When onions are slightly soft, add sausage and continue stir-frying. Add diced green and red peppers. Saute until they are almost cooked, crack eggs into pan.
4. When pepper is almost cooked, add sausage and onion, and then egg.
5. When eggs have slightly solidified, mix eggs and other ingredients and food using a spatula, breaking the egg into different pieces.
6. Add salt and pepper to taste, mix and put on plate. Cut basil leaves into strips and add onto scrambled egg.

Tips

1. The first time, I cooked the sausage and onion together, and the result was rich and greasy. Thus, I recommend cooking the chorizo separately, which makes it easier to remove the oil.
2. Sausage still produces oil when you stir-fry it, so you don't need to add so much oil.
3. Because sausage is also pretty salty, we only add a pinch of salt.
4. If you like cilantro, you can substitute the green onion with it.
5. You can use any pepper you like (such as Fresno).
6. The recipe uses four eggs, but I used 8 egg whites.

Tuesday, November 2, 2010


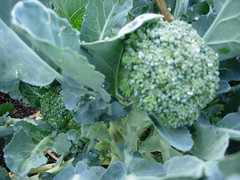
Recipe #54: Shrimp with broccoli

If you've tried our shrimp fried rice and enjoyed it, then I'm sure you've halfway mastered cooking with shrimp. In Chinese dishes that use shrimp, sauteeing is the most common method.

To ensure that the shrimp is tender, they are briefly "soaked" in hot oil. The heat of the oil would cook the shrimp. However, this method results in a lot of grease, which is unhealthy. Also, only a small portion of the oil is actually used up, which is wasteful. In sauteeing the shrimp, we use two methods. One of them is to put them in a mixture of cooking wine and corn starch. The other method is to use a mixture of a tablespoon of cooking wine and a tablespoon of egg whites. The latter is more traditional, but it will leave chunks of egg white, which negatively impacts presentation. However, the first method will work just fine.

Ingredients

1. 1 broccoli, flowers only
2. 1/2 - 2/3 lb. shrimp, peeled and divined
3. 1 tsp. of both corn starch and cooking wine
4. salt and pepper to taste
5. 1 Tbsp. and 1 tsp. oil, divided

Directions

1. Cut broccoli into stalks. Each piece should not be too large; otherwise it will taste raw.
2. Prepare a pot of water with 1 tsp. salt and 1 tsp. oil added. When water boils, add broccoli and keep the lid on. When boiling resumes, turn off heat. After the boiling stops again, drain the broccoli and put into a plate, arranged in a circle.
3. Refer to the recipe for the shrimp fried rice for instructions on how to prepare the shrimp.
4. When shrimp is fully cooked, put in center of plate.

Tips

1. This creates an excellent presentation. If you are serving to yourself, you can use an easier method: drain the cooked broccoli aside; when the oil is heated, cook the shrimp until it is about 80% done and add shrimp. Saute and mix the shrimp and broccoli. If you use this method, the broccoli will contain the taste of shrimp, which improves the flavor.

Sunday, October 31, 2010


It's like living in a fairy tale world!
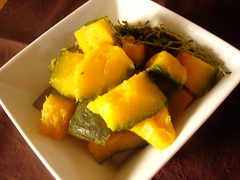
Recipe #53: Japanese pumpkin (kabocha)


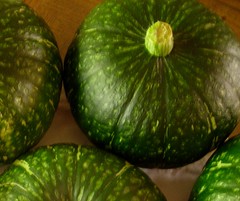
When I first heard the story of Cinderella, I was fascinated with the magical pumpkin. It was cute and vivid, and I loved pumpkins at the time. Every year, as Halloween approached, we would buy all sorts of pumpkins. They made great decorations, and we would sometimes carve them. We even make some of them into desserts!

But when we planted Japanese pumpkin for the first time, we realized how good they were! They are extremely tender, and anyone who has tried them (including Americans who tried it for the first time) said they had never eat something so tender. They said it was like avacado. After they were more ripe, people said the pumpkins tasted like sweet potatos. Some even asked us if sugar was added. Since then, we no longer have "regular" pumpkins on our dining tables during Halloween.

Ingredients

1. half of a Japanese pumpkin, chunked and seeded
2. 2 sprigs of thyme
3. Salt to taste
4. 1/4 c. water
5. 2 pcs. ginger
6. 1 tsp. oil

Directions

1. Put oil in skillet; when oil is warm, add the ginger.
2. Add pumpkin and thyme; sprinkle salt and saute for about a minute.
3. Add water and put on lid, and turn heat to a lower medium-high.
4. After about five to seven minutes, or when water has evaporated, it is ready.

Tips

1. Thyme best matches the taste of pumpkin, better than the other herbs.
2. If you don't have herbs, you don't have to use them.
3. Soy sauce lovers can add some soy sauce and reduce the salt. In this case, don't add the thyem.
4. If you're having trouble chopping the pumpkin, cut it into wedges.

Friday, October 29, 2010


Turn leftovers into a great new dish!
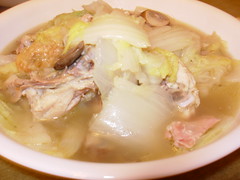
Recipe #52: roast chicken with Napa cabbage


A while ago, we told you how to make a roast chicken flavored with herbs and lemons. If we don't have lemon, my mother would use salt, pepper and butter as a rub, which results in a beautiful roast chicken.

If we have leftovers, my mother would try to make it into a new dish. One of them uses Napa cabbage. Since my father loves roast chicken with Napa cabbage, my mother would sometimes use the entire chicken (save two legs for me) for this dish.

Ingredients

1. roast chicken (depends on how much you have), with the juice saved
2. 1 lb. Napa cabbage, cut into 1" x 1" chunks
3. 3 pcs. ginger
4. salt and pepper to taste
5. 1 1/2 Tbsp. oil

Directions

1. Heat oil in a large pot and add ginger.
2. Add Napa cabbage and saute. When it softens, add salt and pepper.
3. Cut chicken into pieces and put into pot (include the juice). Using a spatula, lightly stir the ingredients.
4. Put on lid and turn heat to low-medium.
5. After about ten minutes, put into bowl and serve.

Tips

1. Because we love Napa cabbage, we usually use 2 lbs. and let it cook for longer (for up to 30 minutes) to allow the flavor to get in. This creates a great aroma, but the chicken will lose flavor. Yu can adjust the cooking time to your needs, depending on which flavor you like.

Wednesday, October 27, 2010


Recipe #51: Omurice

If you like both omelettes and fried rice, you won't have a dilemmatic choice. You can enjoy the taste of both!

Ingredients

1. Refer to the ingredients for the shrimp fried rice. Omit the scrambled eggs, but prepare ten fresh eggs.
2. If this is too much, you can reduce the amount.
3. Ketchup (depends on how much you like)

Directions

1. Use the same method for making the fried rice, minus the scrambled eggs.
2. Add salt to eggs and beat them.
3. Add 1 Tbsp. oil to a saucepan. When oil is hot, add about two eggs into the pan and let it cook.
4. When egg is half cooked, add 1 c. fried rice and fold the egg and wait until the egg is fully cooked.
5. Move to plate, add ketchup and serve. Repeat the process for the remaining egg mixture.

Tips

1. If you are concerned about high cholestrol, you can replace some of the egg yolks with egg whites.

Monday, October 25, 2010


If you've never tried rice, you can start from this dish
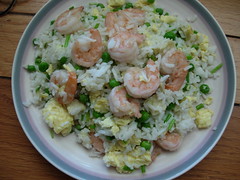
Recipe #50: Shrimp fried rice


Rice is the main staple in Chinese cooking. However, ever since I started eating, I have refused to touch anything with rice. The older folks always thought, "How could this kid grow if he doesn't eat rice?" They saw it as a serious problem. "How could a mother not let their child eat rice? That will spoil him!"

I really ought to thank her. She has never gotten mad at me for refusing to eat rice. When I was about seven, she started to encourage me by giving me a tiny bit of rice at once. I stopped rejecting rice, but I would still eat only that tiny bit, and nothing more. However, I fell in love when I tried fried rice for the first time.

Whenever my family wanted to go out to eat at a Chinese restaurant, my only demand would be fish or fried rice (preferably both). However, most fried rice sold in restaurants is way too oily. In some cases, I could smell that the oil was not fresh, and I'd wonder if the oil was already used to fry something else. One of my mother's friends told us that she would develop a rash each time she eats fried rice.

If you like fried rice, I recommend making your own.

It's really not hard to make; many of my mother's friends first dishes are fried rice.

Ingredients

1. 2 green onions (scallion), chopped
2. 3 large eggs
3. 1/2 tsp. cooking wine and 1/2 tsp. corn starch
4. 1 tsp. salt
5. Pepper to taste
6. 4 Tbsp. oil, divided.
7. 4 cups long grain or brown rice, cold and cooked
8. 1 - 2 Tbsp. light soy sauce (optional)
9. 1/2 cup frozen peas, corns or other beans
10. 2/3 c. shrimps, peeled and divined

Directions
1. Put shrimp in a mixture of 1/2 tsp. cooking wine and corn starch, place in refrigerator for at least an hour.
2. Heat water in a pot. When it boils, add peas and corn. The pot stop boiling momentarily; when it resumes boiling, remove heat and drain the pot in a sieve. Set aside.
4. Lightly beat the eggs, adding a tiny pinch of salt.
5. Heat a wok or frying pan and add 2 Tbsp. oil. When the oil is hot, add the eggs. Stir and break up the eggs until they resemble scrambled eggs. Remove eggs and set aside.
6. Add 1 Tbsp. oil in a heated fried pan. Add shrimp and stir lightly until color turns pink. Set aside.
7. Add another Tbsp. oil in heated fried pan, and add rice. Stir-fry for a few minutes, using a wooden spoon to break the rice apart. Stir in the cooked vegetables. Sprinkle salt and pepper to taste.
8. When the rice is heated thoroughly, add the egg and green onion and shrimp back into the pan. Mix well and turn off heat. If you like soy sauce, you can may add it now. Server hot.

Tips

1. You can substititue white with brown rice.
2. If you are a vegetarian, you can omit the shrimp.
3. You can use any of your favorite vegetables, such as carrots and shelled edamame beans. However, carrots have a stronger taste, so we usually don't add carrots when we use shrimp.
4. Some people like oyster sauce or ketchup. You can add these sauces if you want, but be sure to adjust the amount of salt as well.

Saturday, October 23, 2010


Even meat lovers would love this meatless dish
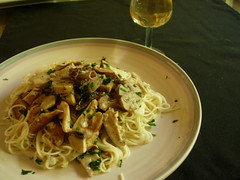
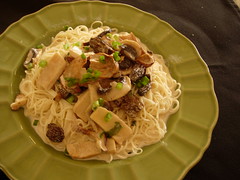
Recipe #49: Angel hair with mixed mushrooms


I usually enjoy Italian pasta with meatballs, chicken or seafood. However, my mother has made two types of meatless pasta, both of which I love.

Especially this one. It is very aromatic and very delicious. Because this dish uses heavy cream and mixed mushrooms, it is hard to describe its incredible taste. Even a meat lover would like this.

Ingredients

1. 1/2 lb. angel hair
2. 2 c. mixed mushrooms
3. 3 cloves or garlic, finely chopped
4. 3/4 -1 c. heavy cream
5. 2 Tbsp. water
6. 1 Tbsp. olive oil
7. 1 Tbsp. white wine
8. sea salt and pepper to taste
9. chopped parsley

Directions

1. Follow the directions on preparing the angel hair. Remove from pot and set aside.
2. In a skillet, saute the mushrooms using medium-heat high heat.
3. Add garlic and continue sauteeing.
4. Add white wine, heavy cream and water. Bring mixture to a boil.
5. Add pasta into skillet, add salt and pepper, and move to plate.
6. Sprinkle with parsley and serve.

Tips

1. Various types of mushrooms (shiitake, shimeiji, abalone, button, etc.) are sold at farmer's markets.
2. If you can't them, you can buy dried mushroom mixes at warehouse stores, such as Costco.
3. Alternatively, you can look for frozen mushrooms, which are ready to use once they are thawed.
4. When cooking the angel hair, you can add oil and salt. Not only does this improve the taste, it also keeps the pasta apart and prevents the pot from frothing up, which can make a mess.
5. If you have any extra pasta, you can rinse it in cold water and add oil so it won't stick together.
6. Heavy cream is very rich, so this is why we add two Tbsp. of water.
7. When you add the pasta to the skillet, it will suck up the heavy cream. Don't add more heavy cream because of this; it will ooze out of the pasta again.
8. This pasta is very light, so you don't need to add cheese.
9. If you don't have parsley, you can use chives.

Friday, October 22, 2010


Great breakfast = great weekend
Recipe #48: Scrambled egg with Italian sausage


I have always loved American-style breakfast in restaurants, especially their omelettes or scrambled eggs. These breakfast add to the great memory of family trips. Sometimes during the weekends, we would have these breakfasts. In enjoying the meal, I get to reminisce the great feelings of vacations past, which brings about a great weekend.

Ingredients

1. 1/2 yellow onion, diced
2. 1 Italian sausage (any flavor you like)
3. 1/2 green peper, diced
4. 1/2 giant green pepper or 1 chili green paper, diced
5. 2 Tbsp. scallions (green onions)
6. 2 basil leaves
7. 1 Tbsp. oil
8. 4 eggs
9. black pepper to taste
10. pinch of salt

Directions

1. Cook sausage in pot until well done.
2. When sausage cools, remove skin. Tear into small bits.
3. In a skillet, add oil. On medium-high heat, when oil is slightly warm, add onions.
4. When onions are slightly soft, add sausage and continue stir-frying.
5. Add diced pepper. Saute until they are almost cooked, crack eggs into pan.
6. When eggs have slightly solidified, mix eggs and other ingredients and food using a spatula, breaking the egg into different pieces.
7. Add salt and pepper to taste, mix and put on plate.
8. Cut basil leaves into strips and add onto scrambled egg.

Tips

1. Sausage tends to be very rich. If you cook it first, it removes a lot of the oil. You can cook save some of the sausage for later use.
2. Sausage still produces oil when you stir-fry it, so you don't need to add so much oil.
3. Because sausage is also pretty salty, we only add a pinch of salt.
4. The sausage we use has a very strong basil taste, so we use basil only as a garnish.
5. You can use any pepper (red, green, etc.) you like. We use the ones picked from our backyard.
6. The recipe uses four eggs, but we use only one whole egg, and egg whites for the rest.

Wednesday, October 20, 2010


Recipe #47: curry tofu with peppers and onion

Curry usually carries a bit of spice. Since I disliked spicy foods when I was young, I would stay far, far away from my mother's curry, no matter how good it smelled. That is, until curry was recently discovered to have health benefits, such as its antioxidizing properties, alleviation of digestive problems and high iron content. I decided to try some for the first time. My mother like the Indian curry due to its authentic flavor - both strong and spicy. For me, however, she made a milder version.

Curry roux can often be found in Asian supermarkets and are mostly made in Japan. They are very convenient to use, but they tend to be too thick and sweet, so my mother made a modified version.

Ingredients

1. 1/2 carton tofu (1/2 lb.), cut into blocks
2. 1/2 onion, cut into medium-small pieces
3. 2-3 green and red bell peppers, cut into chunks
4. 2 cloves of garlic, pounded and shelled
5. 2 blocks of Japanese curry
6. 3 Tbsp. water
7. 1 tsp. Indian curry powder
8. salt to taste
9. 1 c. oil for frying

Directions

1. Using a small pot, fry until tofu is golden. Set aside.
2. In a separate pot, add water and curry blocks. Stir fry and mix until the blocks dissolve and the curry becomes thick.
3. Add 1 Tbsp. oil into a frying pan. Put garlic and allow its aroma to permeate, and add onion.
4. When the onion chunks soften, add the peppers and continue stir-frying. Add the tofu.
5. Pour in the curry sauce and powder, and add salt. Mix together and serve.

Tips

1. There is an increasing number of imported goods stores that sell jars of curry sauce. Although there is a great variety of flavors, you can use any one (about 1/4 c. will be enough) you like.
2. Japanese and Korean curry come in mild, sweet and spicy types. The Korean curry is more spicy and not as sweet, while Indian curry is both strong and spicy.

Monday, October 18, 2010


Yes, it's OK to have seconds!
Recipe #46: Boston pie


I love cakes with butter or whipping cream. However, due to the increased awareness of nutrition and calories, I tend to think twice before going for that second serving.

With our modified version, though, I don't have to worry about nutritional guilt!

There are different ways to make Boston pie. I tried two different methods, and I noticed that the pie is a lot finer, softer and silkier if I used the method for making the chiffon cake.

Ingredients

1. 4 eggs, whites and yolk separated
2. 3/4 c. sugar, divided into 1/4 c. and 1/2 c., plus an additional Tbsp.
3. 1/2 c. oil + 1 Tbsp.
4. 1 Tbsp. rum
5. 1 c. milk
6. 1/2 c. + 2 Tbsp. cake flour
7. 1 tsp. baking powder
8. 1/2 tsp. cream of tartar
9. pinch of salt
10. 3/4 c. heavy cream
11. powdered sugar

Directions

1. Preheat oven to 350 F.
2. Put egg whites and yolks in separate, clean bowls. They should not come into contact with any other liquids.
3. Mix egg yolks and add 1/4 c. sugar. Mix well, add oil rum and milk, and mix further.
4. Prepare another bowl, and mix flour and baking powder and sift.
5. Put the two mixtures together. Using a mixer, beat the egg whites at high speed. Add half of the 1/2 c. sugar (or 1/4 c.), to the egg whites. Beat for about ten seconds, and add the cream of tartar and remaining 1/4 c. sugar. Continue beating until small peaks form.
6. Mix about 1/3 of the meringue into the flour mixture (in a folding motion) at a time using a spatula, until no white streaks remain.
7. Pour batter into a tube pan. Cut through it to release air. Put in preheated oven and bake for about 25-30 minutes.
8. Remove the cake, turn it upside-down and let it cool completely. Take out the pie from the mold.
9. When base is cool, remove from mold and cut into half from the side horizontally.
10. Beat heavy cream and 1 Tbsp. sugar and beat at high speed until foamy.
11. Add mixture to cake base, thick at the center and thinner at the edges.
12. Put other half of cake base on top and add powdered sugar.

Tips

1. Most people like two layers of cream. If you want two layers, you can increase the amount of heavy and and sugar.
2. If you want a pie with two layers, a 7" pan is the best choice.

Sunday, October 17, 2010


A snack that will make you feel good all day...
Recipe #44: coffee cookies


Very few people could resist the temptation of the smell of coffee. Any cakes, bread or cookies that use coffee would smell (and taste) very good, so many people to use it as an ingredient.

Recently, studies have shown that frequently smelling coffee is good for the heart. One of our family friends had a heart surgery and was recommended not to drink coffee, but to smell the vapors. This supposedly makes the heart more active.

Our house is often filled with the aroma of coffee. We don't just brew it; my mother also uses it in many of her desserts.

Coffee cookies are among the aromatic desserts my mother makes. When she bakes them, the aroma passes through the doors, windows, flowers and trees, to the hood. Just one cookie will make you want a second, or even the entire plate.

Ingredients

1. 1 c. (2 sticks) butter, room temperature
2. 1 c. sugar
3. 1 Tbsp. rum
4. 1 1/2 - 2 Tbsp. instant coffee powder
5. 1/4 c. hot water
6. 2/3 c. cake flour
7. 1/4 tsp. baking powder
8. 1/2 c. almonds, sliced

Directions

1. Preheat oven to 350 F.
2. Dissolve coffee powder in hot water.
3. Mix cake flour with baking powder well, and sift.
4. Using a mixer, beat butter until it has a soft consistency.
5. Add sugar and continue beating.
6. Slowly add the coffee mixture.
7. Continue beating will adding rum.
8. Add flour mixture and sliced almond, and mix well gently with your hands until it becomes a soft dough. Let mixture rest for 15 minutes.
9. Removing a portion at once, roll it into a ball and press into the shape of a cookie.
10. Place on middle rack of oven and bake for about 20 minutes.

Tips

1. We substitute 1/3 of the cake flour with whole wheat flour. This is a healthier option that does not affect the texture.
2. You can change the amount of sugar to your liking.
3. You can add another 1/4 c. of sliced almonds if you like.

Sunday, October 10, 2010


How to enjoy a cake without getting fat
Recipe #43: green tea chiffon cake


Every year, my parents would take me to a well-known bakery on my birthday to buy me something I want. I would usually pick something with a lot of chocolate, mousse, tiramisu or something with a lot of whipping cream.

My mother loves these desserts as well, so the two of us would quickly finish them.

However, after learning some recipes, I started paying more attention to the nutrition value of many ingredients. This year, I decided to celebrate my birthday in a different way: I tried making my own dessert, a "healthy" green tea chiffon cake with reduced fat and sugar.

Recent studies have shown that green tea has many health benefits. For example, it it lowers cholestrol and has antiozidizing properties. If you like angel food cake, you will love this recipe as well. It is full of the aroma of green tea and fresh eggs. Although it looks simple, it is actually quite elegant.

Ingredients

1. 4 egg whites and 3 yolks
2. 1 c. sugar, divided
3. 1/4 c. oil
4. 1 Tbsp. rum
5. 1 c. + 1 Tbsp. water or milk
6. 3/4 c. minus 1 Tbsp. cake flour
7. 4 tsp. green tea powder
8. 1 tsp. baking powder
9. 1/4 tsp. cream of tartar
10. pinch of salt

Directions

1. Preheat oven to 350 F.
2. Put egg whites and yolks in separate, clean bowls. They should not come into contact with any oil or water.
3. Mix egg yolks and add 1/2 c. sugar. Mix well, add oil rum and milk, and mix further.
4. Prepare another bowl and mix flour, green tea and baking powder using a fork and a sieve.
5. Put the two mixtures together. Using a mixer, beat the egg whites at high speed. Divide the remaining sugar into two parts. Add one part the egg whites. Beat for about ten seconds, and add the cream of tartar and remaining sugar. Continue beating until small peaks form.
6. Mix about 1/3 of the meringue into the flour mixture (in a folding motion) at a time using a spatula, until no white streaks remain.
7. Pour batter into a tube pan. Cut through it to release air. Put in preheated oven and bake for about 25-30 minutes.
8. Remove the cake, turn it upside-down and let it cool completely. Take out the cake from the mold.

Tips

1. We personally reduce the sugar to 1/3 cup.
2. We also substitute the milk with soy milk.
3. When a stick inserted into the cake comes out clean, the cake is ready.
4. The egg whites and yolk much be separated carefully. If there is any yolk in the whites, you must remove it; otherwise, the recipe will not turn out well.

Saturday, October 9, 2010

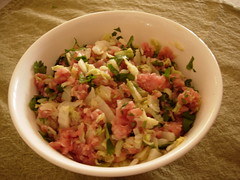
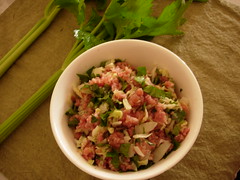
recipe #42: pork with Napa cabbage and cilantro/celery leaf dumpling/pot sticker filling (大白菜香菜/芹菜葉豬肉餡)


Cilantro seeds have a very hard shell, so it's sometimes said that they should be soaked overnight before being planted. My mother has tried sowing fresh seeds, as well as soaking them for one or two days first, but the harvest would always be very small. Because there were so few plants, my mother left them alone. One year, there were so many cilantro plants that they were everywhere. Friends would pick them by the basketfull.

Because there were so much cilantro, my mother thought up ways to use it up. She figured that it would go well with the filling mentioned in the previous recipe. Unexpectedly, the dumplings were very aromatic. (We actually saw pork and cilantro wontons on sale at Costco recently, and the samples tasted much like our dumplings.)

My mother also noticed that celery leaves smelled just as good. Since most of the celery's nutrients are in the leaves, she realized that throwing them away was a waste. The resulting dumplings become very, very good when mixed with chopped cilantro.

The ingredients and directions are the same, except with the addition of 1/2 to 1 c. cilantro or celery leaves at the end.

Tips

The filling can also be used in pot stickers.

In other news...

My mother recently started a blog of her own, which you can view here. It features many of her articles and works of art, but it also contains a fair share of recipes. After all, cooking is an art. :-) Her blog is in Chinese, though.

Thursday, October 7, 2010

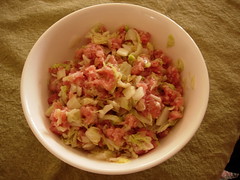
recipe #41: pork with Napa cabbage dumpling/pot sticker filling (大白菜豬肉餡)


Cabbage is a very popular filling in American-style dumplings. However, Napa cabbage (note the difference) is used more widely in Chinese dishes. They have different flavors, but both taste very good.

Ingredients

1. 1 lb. Napa cabbage
2. 3 tsp. salt, divided
3. 1 lb. lean ground pork
4. 1 Tbsp. cooking wine
5. 1 Tbsp. sesame oil
6. Pepper to taste
7. 1 tsp. minced ginger

Directions

1. Prepare a 5-qt. pot with 70% water and bring it to boil.
2. Add washed Napa cabbage, piece by piece, into the pot and remove after ten seconds
3. After it cools, cut it into horizontal strips, and then cut into smaller pieces.
4. Squeeze out the excess by wrapping it in a cheese cloth. (Refer to the linked post for a picture.)
5. In a large bowl, mix the ground pork with ginger, salt, wine, pepper, 1 Tbsp. sesame oil and olive oil evenly.
6. Add Napa cabbage and remaining sesame oil, and mix well.

Tips

1. We use Japanese sake for the cooking wine.
2. If you like soy sauce, you can a Tbsp. of it in the filling.
3. The filling can also be used in pot stickers.

Friday, October 1, 2010

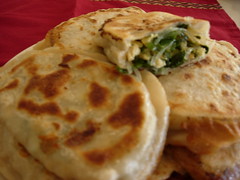
recipe #40: Chinese chive pockets (韭菜盒子)


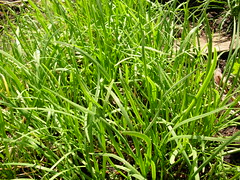
Chinese chives are another popular ingredient in Chinese cooking, as they can be used in many dishes, especially dim sum. They pair with other foods fairly well, such as chicken, pork, fish, shrimp, egg and tofu. There are many different types of dim sum that use Chinese chives, such as dumplings, pot stickers, pork buns and various Cantonese dishes.

Chinese chives are easy to plant and easy to grow. As long as you can get a few chives and plant them a few inches apart, you will get clusters of them after a few years. Due to their fast growth, you will need to divide them every three years or so; otherwise, they will wither and die due to overcrowding. When there is a large harvest, one way to take care of it is to make Chinese chive pockets, which are a very popular dim sum dish among Chinese people, who believe that Chinese chives are good for the body; they have strong energy, especially if haarvest in the early spring, right after the entire winter. The chives are tender and aromatic. They regrow after being harvested, so there is an essentially unlimited supply of them. Due to the strong aroma of Chinese chives, you do not need any meats to create a great taste. There are few people who dislike Chinese chive pockets. There are many methods to improve the taste even more.


Ingredients (filling)

1. 3 eggs, beaten
2. 1 lb Chinese chives, finely chopped
3. 1-2 pieces of bean curb, finely chopped, or 6 oz. fried tofu
4. 1 pack (2 oz.) of dried bean threads (also called crystal noodles, among other names)
5. 1/2-1 tsp. salt to taste
6. 4 Tbsp. plus 2 tsp. cooking oil, divided

Directions (filling)

1. Fill up a 1-qt. sauce pan with 70% water and bring it to a boil.
2. Soak bean threads in boiled water for a minute.
3. Drain the extra water immediately, rinse the bean threads with cold water and drain again. Finely chop the bean threads.
4. Heat 2 Tbsp. of oil and add beaten eggs. Cook and break up bits of eggs into small size and set aside.
7. Heat remaining 2 Tbsp. oil, add Chinese chives and stir-fry for a minute. Add chopped bean curd, continue stir-frying, stir in the bean threads and put eggs back to pan.
8. Add salt and mix well.

Ingredients and materials (wrap)

1. 3 c. all-purpose flour
2. 1/2 c. boiling or very hot water
3. 1/4 c. cold water
4. handful of flour (about 1/4 c.) to prevent sticking during kneading
5. a rolling pin

Directions (wrap)
1. Mix the flour with hot water using a fork.
2. Slowly add the remaining water and combine ingredients to a rough dough shape.
3. Put a handful of flour on a table and knead the dough, making sure to add water or flour until you get a smooth consistency.
4. Cover with plastic wrap for about 30 minutes.
5. Divide dough into about 14-16 pieces. Using a rolling pin, make each piece into an oval shape.

Directions (pockets)

1. Using a large spoon, scoop filling onto center of wrap.
2. Fold the wrap together towards each other; this should create a "semi-circle."
3. Seal the wrap by pinching with your fingers.

Directions (cooking)

1. Put 1 tsp. oil in a large saucepan; turn the pan to evenly distribute the oil.
2. Arrange 7-8 pockets in the pan and cooking using lower medium-high heat. After a few minutes, the bottom will become golden brown.
3. Turn the pockets over and cook until the other side is also golden brown. It is now ready to be served (this part is very important; refer to the tips below for best results).
4. To finish cooking the batch, just repeat step 3.

Tips

1. Some people like an even stronger flavor, which can be achieved by adding 2 Tbsp. of tiny dried shrimps. These are very salty, so you must reduce the amount of salt if you add the shrimps.
2. The reason for using hot water is to make the dough half-cooked. If you used a thin wrap, you only have to cook a little more. If you can't make the wrap so thin, you can use the same method for the pot stickers, except you must add 3/4 c. water.
3. If you have leftover pockets, you can microwave them after storing them in the freezer; it still tastes very good. Also, you can keep the uncooked pockets in the freezer and cook them later. You don't have to thaw them, but you must use the method for the pot stickers.


Thursday, September 30, 2010


A classic favorite
recipe #39: roast chicken breast salad with sesame dressing


If we have any leftover chicken breasts from the roast chicken, or if I want some salad with an Asian sesame dressing, we would save some chicken breast. This salad is very, very fresh. This is one of those recipes that everyone has been asking us for.

Ingredients (salad)

1. 2 Romaine lettuce or equal amounts of a variety of your favorite lettuce (such as artisan or spring mix)
2. 1 Japanese cucumber, sliced
3. 1 tomato, sliced (any type is OK, such as cherry tomatoes)
4. about 3 oz. of roast chicken breast
5. 1-2 tsp. sesame seeds

Directions (salad)

1. Was the lettuce throughly and cut into 1" wide pieces. Using a salad spinner, remove the excess water. Put lettuce in salad bowl.
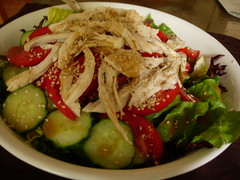
2. Add cucumbers, tomatoes, chicken breast and sesame seeds, in that order.
3. Add the dressing (recipe below) and mix well.


Ingredients (dressing)

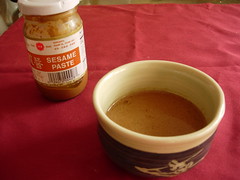
1. 1 1/2 Tbsp. sesame paste
2. 2-3 Tbsp. warm or hot water
3. 1 1/2 Tbsp. soy sauce
4. 2 tsp. agave syrup or 1 Tbsp. sugar
5. 1 tsp. sesame oil
6. 1 Tbsp. rice vinegar

Directions

1. Put sesame paste in a bowl and add the water. Using a spoon, mix while pressing against the bowl until mixture becomes smooth and creamy.
2. Add the other ingredients for the dressing and mix well.

Tips

1. Sesame paste is sold in most Chinese supermarkets. However, different brands have different thicknesses. You can use the viscosity of the paste to determine how much water you need.
2. For peanut butter lovers, you can add substitute some of the paste with peanut butter.
3. The sesame seeds can be put in either the salad or the dressing.

Tuesday, September 28, 2010


recipe #38: zucchini bread (yeast)

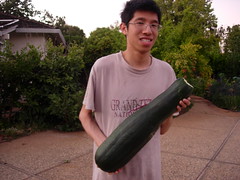
If we don't harvest the zucchinis for a few days, then we are in for a surprise. They are often hidden by the leaves, and when discovered, they can grow up 11-12pounds. Such a large squash would be very hard to cut, and we would even wonder if it is edible. But when we tasted it, it was still very fresh, tender and sweet.

We figured that it would make good bread. Not only does the bread taste better than expected, it is crispy on the outside and soft on the inside. Whether we eat this this way, grill it or use it in sandwiches, the zucchini is very useful.


Ingredients

1. 1 c. water or buttermilk
2. 1 tsp. sugar
3. 1 Tbsp. agave syrup
4. 2 Tbsp. oil
5. 1 1/2 c. zucchini, gratsw
6. 1 1/2 c. whole wheat flour
7. 3 c. bread flour
8. 1 Tbsp. sesame seeds
9. 1 tsp. salt
10. 2 tsp. yeast
11. Red hot pepper (optional)

Directions

1. In the mixing bowl of an electric mixer, stir together warm water, sugar, and yeast. Let yeast grow for a couple minutes; it will bubble almost immediately.
2. Add 2 1/2 c. bread flour, whole wheat flour, salt, agave syrup, oil and zucchini into the mixing bowl.
3. Mix on low speed (level 2) with a dough hook, add remaining 1/2 c. bread flour into the bowl, and keep kneading for about 10 minutes until dough pull away from the bowl.
4. Remove dough from bowl and knead until smooth.
5. Cover dough with a damp cloth and let it rise in a warm spot for an hour, or until it has doubled in size.
6. Divide dough into two pieces. Shape them into loaves, and place in greased loaf pans. Let them rise again about 30 minutes.
7. Bake in a preheated 350 F oven for 35-40 minutes, or until the tops of the bread are golden brown.
8. Let loaves cool in pans for few minutes, and put them on wire racks to cool completely.

Tips

1. If you have a bread machine, mix the ingredients according to the directions for the bread machine. Set it to basic.
2. If you want, you can add various types of seeds or grains. This adds a country style.
3. The reason for keeping 1/2 cups of flour is because the dough will be hard at first. But when the juices from the zucchinis are released, they will mix well with the dough. At this point, you can add additional flour to adjust the softness of the dough your liking. The recipe will not have exactly three cups of flour.
4. For the adventurous ones, you can replace the peppers with jalapenos; the bread would still taste pretty well.

Monday, September 27, 2010


Zucchini and chocolate? You bet!
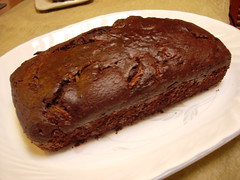
recipe #37: zucchini chocolate bread


It's sometimes said that zucchini must be planted two at a time so that they could pollinate each other, or else there would be very few fruits. When we first planted zucchinis, we only planted one at a time. Contrary to our expections, there were still a lot of zucchinis.

However, no matter how many there were, the birds would eat them, down to the blossoms and the tiny fruit. Those that survived would fall prey to slugs and snails. Out of the remainings, the squirrels would steal them. We would be lucky if we could harvest even two zucchinis.

On the third year, my mother planted six plants, and there should have been plenty left over. However, it still wasn't enough for them! She bought some netting to protect them, and this time, there were so many zucchinis that we started giving them away to neighbors, friends, relatives and even the postman! She even thought about giving them to strangers!

My mother has made many zucchini dishes, breads and desserts (yes, even desserts).

Ingredients

1. 2 oz. unsweetened chocolate, molten
2. 3 eggs
3. 2 c. sugar
4. 1 c. oil
5. 2 c. grated zucchini
6. 2 c. all-purpose flour
7. 1 tsp. baking soda
8. 1 tsp. baking powder
9. 1/2 tsp. salt
10. 2 tsp. vanilla extract
11. 1/2 tsp. cinnamon and 1/2 tsp. nutmeg, ground (optional)
12. 1/2 c. semisweet chocolate chips or 3/4 c. walnuts

Directions
1. Preheat oven to 350 F (175 C). Lightly grease a large loaf pan.
2. Mix flour, cinnamon (nutmeg), salt, baking soda and baking powder well.
3. In a large bowl, beat eggs, and combine oil, sugar, vanilla extract, grated zucchini and molten chocolate; mix well.
4. Fold in flour mixture, and then walnuts (or chocolate chips)
5. Pour batter into prepared loaf pans.
6. Bake in preheated oven for about 1 hour, or until a toothpick inserted into the center of a loaf comes out clean.

Tips

1. Chocolate chips can be melted in bowl over water-filled frying pan on low-medium heat, in which case you must stir until smooth. Alternatively, you can microwave the chocolate at 50% for about two minutes.
2. You can shape the bread into that of desserts, such as cupcakes.
3. You can substitute the sugar with brown sugar. If you use regular chocolate chips, you can reduce the sugar to 1 to 1 1/2 cups. Basically, we use very little ourselves.

Sunday, September 26, 2010

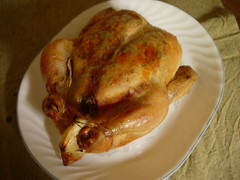
recipe #36: roast chicken


recipe #36: roast chicken

Roast chicken is ubiquitous; it can be bought anywhere and not too costly. Because of this, it seems like there is a piece of chicken in everyone's hands. However, it's not easy to acquire organic chicken. If you want organic foods, you will have to go to a specialty shop or restaurant. Whenever we want organic chicken, we have to cook it ourself. We do not use the traditional method of pasting the butter on the outside. Instead, we put herbs and butter under the skin and a lemon stuffing, which give a fresh taste. It's not easy to get this taste in fast food restaurants.

Ingredients

1. 1 chicken
2. 2 bunches of thyme and rosemary sprigs, divided
3. 1/2 stick of butter, softened
4. 1 1/2 tsp. salt and 1/2 tsp. pepper, divided
5. 2 cloves of garlic, minced
6. 1 lemon, cut into quarters

Directions
1. Preheat oven to 425 F.
2. Rinse chicken with cool water, inside and out, and pat it dry with paper towels.
3. Divide the herbs, chopping half of them and keeping the other half whole.
4. In a small bowl, mash the softened butter with the chopped herbs, minced garlic, 1/2 tsp. salt 1/8 tsp. pepper until combined.
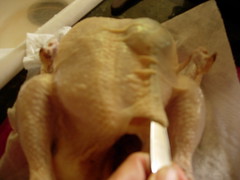
5. Lift the skin of breast side and stuff the butter mixture under the skin.

6. Rub remaining salt and pepper over the outside of the chicken.
7. Stuff the lemon and remaining herbs into the cavity.
8. Tie the legs together with kitchen twine to retain its shape.
9. Place the chicken breast-side up in a roasting pan, and roast for 50-60 minutes.
10. The chicken is done when an instant-read thermometer reads 165 F, or when a stick inserted into the thickest part of the thigh comes out with clear juice.
11. Remove the chicken to a plate. Remove the twine and stuffing, and serve.

Tips

1. You can adjust the amount of salt and pepper to your liking.
2. Every oven is different, so you must make sure that the chicken is well done.
3. A spoon is very useful in lifting the skin, since it is curved and less likely to tear the skin.

Saturday, September 25, 2010

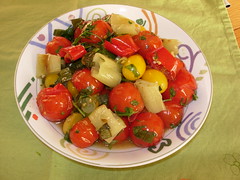
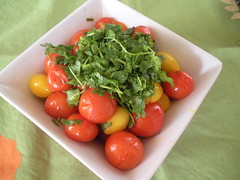
recipe #35: roast cherry tomatoes with cilantro and hot peppers (焗烤小蕃茄)


recipe #35: roast cherry tomatoes with cilantro and hot peppers

We plant about 20-30 tomato vines every year. They were mostly large varieties, such as steak tomatoes, heirloom tomatoes, and tomatoes on the vine. We also had a fewer number small types, such as grape and cherry tomatoes.

However, we noticed that the small tomatoes taste very good. As a result, we now plant more of the small than large varieties. At times it would seem that there are a lot of tomatoes, but it only takes about two dishes or so to use them up. This is because we use about four pounds every time!

This recipe is designed for "regular" people. But if you consume as much tomatoes like popcorn, you can scale this recipe up.

Ingredients

1. 2 pints of cherry tomatoes
2. 2 scallions (green onions), chopped
3. Handful of cilantro, chopped
4. 2 Tbsp. extra-virgin olive oil
5. Salt and pepper to taste
6. Variety of hot peppers (optional)

Directions

1. Preheat the oven to 400 F.
2. Place tomatoes, scallions, and optionally, peppers, on a sheet pan. Drizzle olive oil over vegetables and season with salt and pepper.
3. Using hands, mix the vegetables around until they are coated with oil.
4. Roast until the tomatoes start cracking, which takes about 10-15 minutes.
5. After removing the tomatoes from the oven, chop the peppers (if you're adding them) into small pieces and add cilantro. Mix the vegetables well and serve.

Tips

1. The time it takes to roast the tomatoes depends on their size. Homegrown cherry tomatoes are often much larger than those sold in the supermarkets and take more time to cook.
2. Peppers take 5-6 minutes longer to cook than tomatoes. It is recommended that you roast them separately.
3. If you add peppers, there will be a sweet and spicy aroma.

Friday, September 24, 2010


Putting that extra harvest to good use
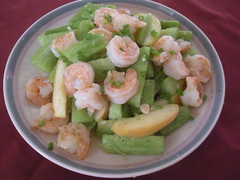
recipe #34: shrimp with cucumber


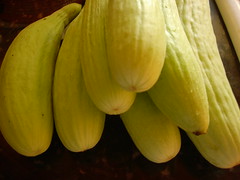
The weather in Northern California is unsually cold this year, especially during the mornings and evenings. As a result, many plants will fail to sprout. At nurseries, there are very few varieties of plants. We tried planting pickle and Japanese cucumbers, but they would not grow. We visited nurseries but did not find any on sale. The only thing we found were American cucumbers, which we had never heard of before.

Out of four plants, one of them was eaten by bugs during the first week. The remaining three nearly froze over. Only until the weather warmed up during a few weeks in July and August did the plants suddenly grow. And when they did, there were piles of cucumbers!

The cucumbers carry a light fragrane, which pairs well with that of shrimp. This dish is light and refreshing.

Ingredients

1. 3/4 lb. raw shrimp, peeled and divided
2. 1 lb. cucumbers
3. 1 small apple, cored and sliced
4. 2 Tbsp. olive oil
5. 2 large cloves of garli, finely chopped
6. 1 Tbsp. chives, chopped
7. 1 Tbsp. lemon juice
8. Salt and pepper to taste
9. 1 tsp. cooking wine
10. 1/2 tsp. corn starch

Preparation

Clean shrimp and put in small bowl. Add wine and corn starch, and mix well. Put in refrigerator for about half an hour.

Directions

1. Slice cucumbers in half lengthwise, cut each piece into thirds and cut every resulting piece into 1-1.5" "sticks." (If the seeds are too tough, you an remove them with a spoon; this step is not necessary for tender seeds.)
2. Heat a saucepan over medium-high heat. Add oil.
3. When oil is slightly hot, add cucumbers and apples, and saute for a minute.
4. Add garlic and continuing sauteing.
5. Add shrimp to saucepan and sautee until shrimp turn pink. Add salt and pepper to taste.
6. Transfer to plate and add lemon juice. Sprinkle chives.

Tips

1. As you've probably guessed, we use Japanese sake for the cooking wine.
2. If you have pickled cucumber, you can use the exact same ways. For Japanese cumbers, which are finer, you can only have to cut the halves into halves, not thirds.
3. You can use parsley or dill instead of chives. They have their own special fragrances.
4. The reason for putting the shrimp in the refrigerator is to give them a crispy texture. They will also look more clear.
5. If you don't have white shrimp, you can use prawns instead. Prawns have a stronger taste, so you may want to use parsley or dill.
6. You can use other fruits instead of apples, such as peaches and apple pair for white shrimp.